When we search or browse online at various web browsers and devices for various reasons, whether personal or professional, the online search history we acquire may quickly accumulate. When this happens, your computer may become slower and your system performance may suffer as a result.
And if you value your privacy, allowing your personal information to be saved in the browser history isn’t an ideal condition. That is why it is critical to clean your Google search and remove your browsing history regularly.
What is Search History?
Web browsers often save information locally to offer the user a history list that allows them to return to previously viewed pages. It might represent the user’s preferences, requirements, and surfing behaviours.
How to Clear Your Search History
Deleting your Google search history does not imply that Google deletes your search data. Even if you erase the information about your activity, Google retains records of how and when you use particular features. You may, however, erase it so that inquisitive eyes in your life do not notice it.
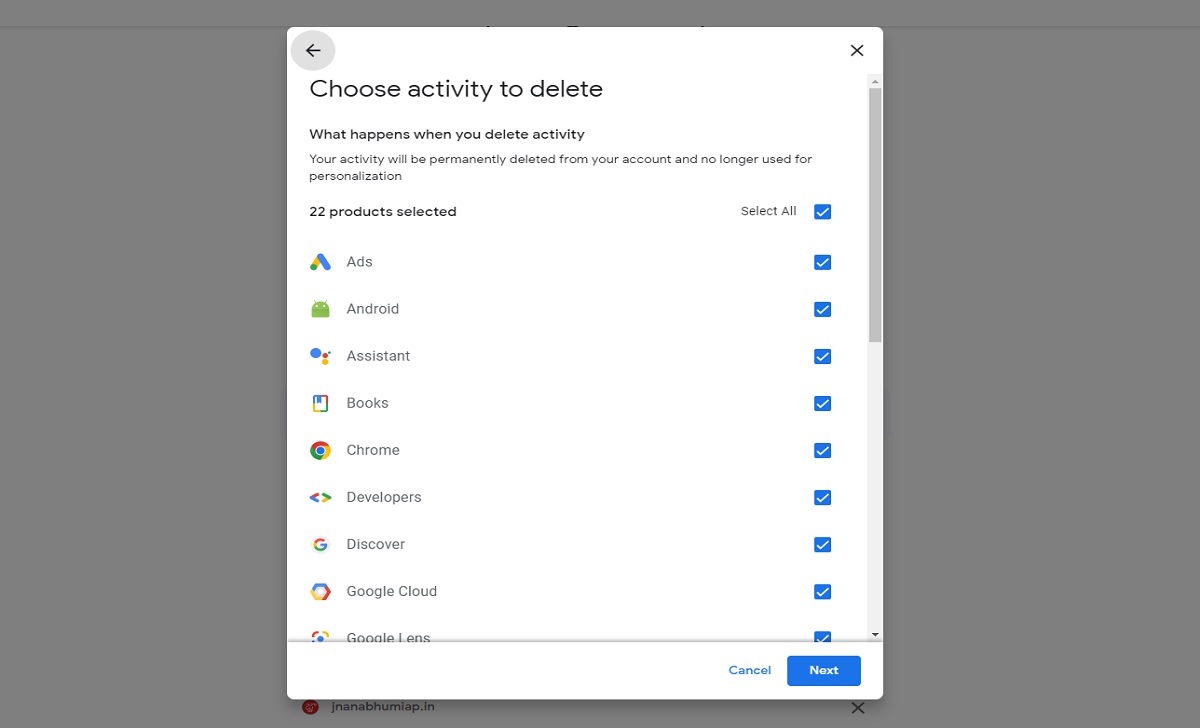
Delete your Google Search History
The deletion of your search history does not remove all traces of your web activity. If you have a Google account, it collects data not just on your searches and websites visited but also on the movies you view and even the areas you visit.
- In the upper-right corner of Google Chrome, select your Google Account icon.
- Choose the Manage Your Google Account option.
- Upon this left, choose Data & Privacy.
- Choose My Activity from the History settings section.
- To remove an item from your activity list, click the X button next to it.
- Depending on how much search history you want to erase, click the Delete button and choose from the Last hour, Last day, all time, and Custom range choices.
Delete your Bing Search History
You may delete your Bing search history in four simple steps. Unless your cache is much filled, this should just take a few minutes. This is what you should do:
- Open the Bing website at https://bing.com.
- At the top right-hand corner, press on the four horizontal lines.
- Next, Click ‘Search History’ once in the drop-down menu.
- On the following screen, on the right, choose ‘Clear Search History’.
Clear your Yahoo! Search History
To remove browsing history on Yahoo!, you must first clear this data for the browser you are using. The stages differ somewhat, but the overall procedure is the same.
- On the upper side of the Yahoo! browser, press the “History” button. On the left side of the window, the History panel appears.
- Choose “Clear” from the drop-down menu selection after clicking the “>>” (dual arrows) button at the top of the History screen.
- Whenever asked, choose “Yes” to accept delete. You have cleaned the Yahoo! web browser’s browsing history.
How to Clear Your Browsing History
When you use the internet, your browser saves the addresses of every web page you visit in its history. This allows you to keep track of previous activity and also allows you to swiftly return to websites. Yet, a browser’s history might compromise your privacy.
For example, if you share a desktop or mobile device with others, you may wish to clean it.
Delete your Google Chrome Browsing History
Google Chrome’s History window allows you to erase specific entries from your browser history.
- Launch Chrome on your Desktop PC, Laptop or Mobile Phone App.
- Tap more in the upper right corner.
- Choose History and Tap Clear browsing data on the left.
- Choose how much history you wish to erase. Choose all times to delete everything.
- Select the boxes next to the information you want Chrome to delete, such as browsing history.
- Choose Clear Data.
Delete your Firefox Browsing History
- Start Firefox on your Mac or PC and browse to the Library icon in the upper-right corner of the window.
- In the menu that appears, click “History“.
- Next, from the new menu, select “Clear Recent History“.
- This will cause a pop-up to appear. Next, choose an item from the dropdown menu next to “Time range to clear“.
- Choosing “Last Hour” will remove all of your recent histories, and so on. Choose “All” to remove your complete history since installing the browser or the last time you cleaned your history.
- Keep in mind the “Browsing & Download History” checkbox is selected. You may also clear the data by checking any of the other options.
- To finish, choose the blue “Clear Now” option in the bottom right corner.
Clear the Browsing History in Internet Explorer and Microsoft Edge.
- Start the Microsoft Edge web browser.
- Inside the upper-right corner of the browser window, tap the Settings and More button Microsoft Edge More menu.
- Choose Settings from the drop-down menu towards the bottom.
- Tap Privacy, search, and Services in the Settings box on the left.
- Press the Select What to clear button towards the top of the Privacy, search, and Services box, under the Clear browsing data area.
- Check the box next to Browser history in the dialogue that opens, then press the Clear Now option.
Delete your Opera Browsing History
If you use Opera as your primary online browser, you may erase your browser history by going to the privacy and security options of the browser.
- Choose Settings from the Opera Menu in the top-left corner of the window.
- Select the Clear browsing data from the Privacy and Security area and select next to Browsing history.
- Change the time range to All Time or Specific timeline then Choose Clear data.
Clear Safari History
Apple’s default Safari browser for Mac, iPhone, and iPad makes it simple to remove browsing history. Nevertheless, if you’ve set up the browser to sync your data with your Apple ID, wiping the browser history on a single device would destroy it all.
- Choose Safari from the menu bar while holding down the Option key. Next, Select Clear History without Erasing Browsing Data.
- Select Clear to entire history or another time that is suitable, then choose Clear History.